Structured rest is the most effective treatment for pain at the front of the knee. It's also the most underestimated. Rest assured: it's not simply "stopping running for a few weeks." It's a methodical protocol that allowed Jan to resolve 4 years of chronic pain in 7-9 months. Research shows that this type of pain responds particularly well to structured load management. To better understand the different causes of pain at the front of the knee, consult our complete guide on anterior knee pain.
Jan's Case: How to Resolve 4 Years of "Incurable" Pain?
Jan resolved 4 years of chronic knee pain thanks to a 4-phase structured rest protocol over 7-9 months. This protocol includes identifying triggers, eliminating any irritation, and gradually reintroducing activities.
Jan had been suffering from patellofemoral pain syndrome for 4 years. This is pain at the front of the knee caused by a misalignment of the kneecap. He had tried several treatments without success. His pain was considered "incurable".
We understand how discouraging that can be.
Then Jan applied this protocol methodically. It took him 7-9 months. Result: complete resolution. Return to all his activities. No relapse during the 2-year follow-up. Patellofemoral pain syndrome is the most common cause of anterior knee pain, affecting both runners and office workers. Learn more about this condition and its specific mechanisms.
When to Consult Immediately?
Consult immediately if you have sudden swelling, an inability to bear weight on the leg, a visible deformity, fever, or pain following a trauma. These symptoms are rare but require urgent evaluation.
The vast majority of knee pains are not serious. However, consult immediately if you have:
- Sudden and significant knee swelling
- Inability to put weight on the leg
- Visible knee deformity
- Fever accompanying the pain
- Redness and intense warmth around the knee
- Mechanical locking (the knee gets stuck)
- Pain following a direct trauma
These symptoms are rare. However, they require urgent evaluation.
What are the Three Traps that Sabotage Recovery?
The three main traps are: the runner's stubbornness (underestimating the necessary rest time), 6-8 hour delayed pain (not connecting cause and effect), and believing that "no pain = it's okay" (ignoring stress on tissues).
Before you begin, understand these common mistakes. They are pitfalls that cause most attempts at rest to fail, even for the most disciplined athletes.
Trap #1: The Runner's Stubbornness
The professional recommends "3 months of rest," but due to psychological denial, the runner hears "3 days." When running is part of your identity, the idea of stopping for an extended period feels impossible.
The result: returning to activity too quickly, leading to a relapse and prolonging the problem.
Trap #2: The 6-8 Hour Delayed Pain
The activity might feel fine at the moment, but then, 6-8 hours later, the pain appears. This delay is frustrating because it makes it hard to connect the activity to the pain.
Trap #3: "No Pain = It's Okay"
This belief is misleading. Activities that push your knee to the limit of its tolerance will prevent it from healing, even if you don't feel acute pain at the time.
The good news: Running despite the syndrome won't break your knee. It generally won't cause major cartilage damage. However, recovery takes three times longer. You have a choice: 6 months of structured rest, or persistent pain for 2-3 years. This principle also applies to other conditions like patellar tendinopathy, where load management remains the cornerstone of treatment. Discover our approach for patellar tendon tendinopathy.10 Quick Tips for Understanding Your Pain
The ones that have made the biggest difference in my patients' lives. 1 a day, 2 minutes.
How does the 4-phase protocol work?
The protocol is structured into 4 phases over 5+ months: Phase I (2 months) focuses on identifying triggers, Phase II (1 month) involves complete rest, Phase III (1 month) is dedicated to rehabilitation, and Phase IV (1+ months) guides a gradual return to sport.
Yes, 7-9 months may seem like a long time. However, it's 7-9 months to resolve a problem that could otherwise persist for years. The following table summarizes the 4 phases:
| Phase | Duration | Main Goal | Strict Rules | Permitted Activities | Prohibited Activities |
|---|---|---|---|---|---|
| Phase I: Preparation | 2 months | Identify ALL Triggers | Keep a daily journal, rating each activity from 0 to 3, and noting both immediate AND delayed pain (6-8 hours later). | All activities (observation phase) | No restrictions |
| Phase II: Total Rest | 1 month | Eliminate ALL Tissue Irritation | Never bend knee beyond 20 degrees; eliminate ALL activities (even those rated 0). | 10-minute walks 6 times a day, swimming with a float, arm bike. | Running, stairs, squatting, bending the knee beyond 20 degrees. |
| Phase III: Rehabilitation | 1 month | Maximize Physical Fitness | Only reintroduce activities rated '0' from Phase I. | 60-minute walks, high-saddle cycling, identified '0' activities | All activities rated '1', '2', or '3' |
| Phase IV: Progressive Training | 1+ month | Reintroduce demanding activities | Maximum 10% progression per week, monitor pain 24 hours later | Week 1: 10 min run, Weeks 2-3: 20 min, Week 4: 30 min | Increases > 10%/week |
Phase I: How to identify all your triggers? (2 months)
Identify your triggers by keeping a daily journal for 2 months. Rate each activity from 0 to 3 based on the pain it causes. Also note any delayed pain that appears 6-8 hours later.
A trigger is an activity that causes your knee pain. This first phase requires patience. It is essential.
Method:- List each daily activity
- Rate each from 0 to 3 (0 = no pain, 3 = severe)
- Note the timing: immediate or delayed pain?
- Keep a journal for a minimum of 2 months
- Manual car = rating 2, automatic car = 0
- Cooking with squatting = 3
- Bending the knee to 90 degrees = 3, but to 120 degrees = 1
Some discoveries will surprise you. Young athletes with anterior knee pain, especially those who are growing, can also benefit from a methodical identification of triggers. Consult our guide on Osgood-Schlatter disease to understand this condition that affects active adolescents.
Common mistake: Stopping the journal too early or forgetting about delayed pain.Phase II: How to eliminate all irritation? (1 month)
Eliminate all irritation by stopping ALL activities for 1 month, even those that seem fine. Keep your knee almost straight (less than 20 degrees). Exception: 10 minutes of walking, 6 times a day.
This is the most mentally challenging phase. We know it seems extreme. But this month of strict restriction allows your tissues to truly calm down.
Strict rule:- Eliminate ALL activities, even those rated 0
- Keep your knee almost straight (never more than 20 degrees of flexion)
- Exception: 10 minutes of walking, 6 times a day
- Short walks (10 min x 6/day)
- Swimming with a pull buoy (a float placed between the legs)
- Arm bike (you pedal with your arms instead of your legs)
- Upper body strengthening
Specific quadriceps strengthening will be reintroduced later in the protocol, at the appropriate time. Weakness in this muscle plays a central role in several types of anterior knee pain. Explore our article on the link between the quadriceps and knee pain to understand these mechanisms.
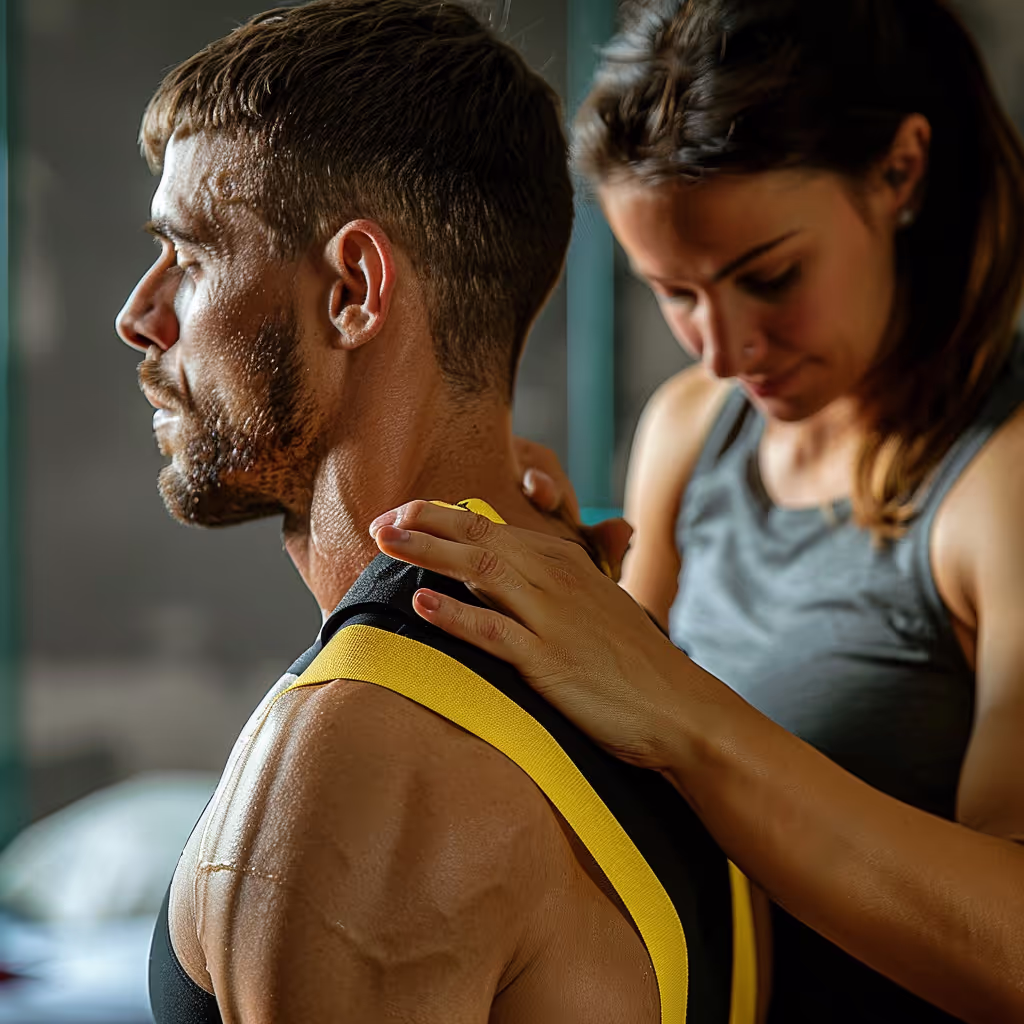
Common mistake: Maintaining activities rated '0' or bending the knee excessively.Need professional advice?
Our physical therapists can assess your condition and provide you with a personalized treatment plan.
Make an appointmentPhase III: How to Safely Resume Physical Activity? (1 month)
Safely resume physical activity by ONLY reintroducing activities that were rated "0" during Phase I. Activities rated "1", "2", or "3" remain prohibited during this phase.
After one month of complete rest, you can finally reintroduce certain activities.
Rule: ONLY reintroduce activities rated '0' during Phase I. Jan's example:- 60-minute walks: acceptable
- Cycling with a high seat: acceptable
- Cooking while squatting: prohibited
Phase IV: How to Resume Running or Sports? (1+ month)
Resume running with a maximum progression of 10% per week. Start with 10 minutes in week 1, then 20 minutes in weeks 2-3, 30 minutes in week 4, and increase by 10% thereafter.
This is the critical stage. Most setbacks occur here. Patience makes all the difference.
Jan's mistake: He returned to full running too quickly. Immediate relapse. He had to start over. Don't make the same mistake. Recommended progression:- Week 1 = 10 minutes of running
- Weeks 2-3 = 20 minutes
- Week 4 = 30 minutes
- Thereafter: maximum 10% increase per week
The 10% rule is recognized in sports medicine. It minimizes the risk of overuse injuries, which occur when a movement is repeated too often.
Common mistake: Returning too quickly to pre-injury volume.What results can be expected with this protocol?
The expected results with this protocol are a complete resolution of chronic pain within 7-9 months. Jan was able to return to all activities without relapse during the 2-year follow-up.
Jan followed this protocol methodically for 7-9 months. This allowed them to resolve a chronic case that had lasted 4 years.
Result: Complete return to all activities. No relapse during the 2-year follow-up.Success depends on diligence. With discipline, resolution is possible, even after years of pain.
How to apply this protocol with a physiotherapist?
A physiotherapist can help you apply this protocol correctly. They identify your specific triggers, adapt the phases to your condition, and guide you to avoid common mistakes.
Applying this protocol on your own can be challenging. It's normal to need guidance.
At Physioactif, we guide our patients through this protocol. We adapt it to your specific situation and help you to:
- Identify your specific triggers
- Adjust the phases according to your condition
- Avoid mistakes that lead to relapses
- Progress at the right pace for YOUR situation
Physiotherapy offers tools that complement structured rest, such as targeted strengthening, manual therapy, and movement re-education. To learn more about our comprehensive therapeutic approaches, consult our guide on physiotherapy for anterior knee pain.
If you've been suffering from chronic knee pain for several months, contact us. An evaluation will determine if this approach is right for your situation.Customer satisfaction is our top priority
At Physioactif, excellence guides everything we do, but our patients are the best ones to tell you about it. Take a look at their verified reviews to get a real sense of their experience.
Discover our physical therapy clinics
We have locations in several areas to better serve you.
Blainville
190 Bas-de-Sainte-Thérèse Road, Suite 110,
Blainville, Quebec
J7B 1A7
Located in Blainville, near Rosemère, the Physioactif clinic is easily accessible to residents of the area and the surrounding communities
Laval
3224 Jean-Béraud Ave., Suite 220, Laval,
QC H7T 2S4
Located in Chomedey, in the heart of Laval, the Physioactif clinic is easily accessible to people in the area
Montreal
8801 Lajeunesse Street,
Montreal,
QC H2M 1R8
Located in Ahuntsic, near Villeray, the Physioactif clinic is easily accessible to residents of both neighborhoods
Saint-Eustache
180 25th Avenue, Suite
201 Saint-Eustache
QC J7P 2V2
Located in Saint-Eustache, the Physioactif clinic is easily accessible to residents of the area and the surrounding communities
Vaudreuil
21 Cité-des-Jeunes Boulevard, Suite 240,
Vaudreuil-Dorion, Quebec
J7V 0N3
Located in Vaudreuil-Dorion, the Physioactif clinic is easily accessible to people in the area
Make an appointment now